New Version: Steps to Include Hashnode Blogs in Your Portfolio

Software engineer with a knack for cracking codes and making digital magic happen. With years spent diving deep into fullstack development, I've honed my skills as a problem solver extraordinaire. I thrive on untangling complex puzzles in the digital realm, crafting solutions that not only work but elevate the game. When I'm not lost in lines of code, you might find me exploring new worlds in video games. Passionate about technology, dedicated to crafting elegant solutions, and always up for the next coding adventure.
Adding blogs to your portfolio website as a developer is like sprinkling a bit of magic on your online presence. Think of it as your secret weapon to showcase your skills and personality in a way that a simple list of projects can't quite capture. Blogs are your canvas to paint a richer picture of who you are beyond lines of code.
First off, they're your chance to strut your stuff. You get to delve into the nitty-gritty of your projects, sharing your wins, struggles, and the "Aha!" moments that led to that brilliant solution. It's like inviting folks into your coding cave and showing them around. Plus, it's not just about flaunting your skills; it's about sharing knowledge. You can offer tips, tricks, and insights you've picked up along the way. It's a win-win: you shine as a knowledgeable pro while helping others navigate through similar coding conundrums. And let's not forget, that Google loves fresh content. Blogs can beef up your SEO game, making it easier for curious souls to stumble upon your work. So, why not give 'em a taste of your coding genius and personality all in one go?
In this tutorial, we'll explore how to dynamically fetch and display your latest Hashnode blog posts on your portfolio website using the Hashnode GraphQL API. This approach will save you from manually updating your website every time you publish a new blog post. We'll walk through the prerequisites, using the GraphQL Playground, crafting the query, and implementing it in a React application.
Prerequisites
A Hashnode blog
A Portfolio website
Basic GraphQL knowledge
Hashnode API
The Hashnode Public API is a GraphQL API that allows you to interact with Hashnode. We are going to use this API to fetch data about our latest 3 blog posts, like Title, Description, Cover Image etc.
GraphQL Playground
For fetching the data, we have to interact with the graphql interface Hashnode provides to figure out the query we need to send as a request. After playing around a bit, I found that the below query works out for me.
query{
  publication(host: "aksbad007.hashnode.dev") {
    title
    url
    posts(first: 3) {
      edges {
        node {
          title
          url
          publishedAt
          seo {
            description
          }
          coverImage {
            url
          }
        }
      }
    }
  }
}
Although the query is pretty straightforward, the gist of it is that we are going to be fetching the Title and URL of our blog along with a List of Blog Posts. This list will have the following data about our 3 latest published blog posts.
Title: The title of the post.
URL: The link to the post.
PublishedAt: An ISO datetime string corresponding to when the post went live.
SEO: This object contains the field description that contains the meta description of our blog post. If you don't define meta descriptions for your posts, you can use the brief field instead of SEO.
CoverImage: This object contains the url of the image used as the cover image of the blog.
Note that we have to supply the host as an input field to the query.
Upon executing this query, you will receive a response similar to the one below.
{
  "data": {
    "publication": {
      "title": "Akshat's Tech Blog",
      "url": "https://aksbad007.hashnode.dev",
      "posts": {
        "edges": [
          {
            "node": {
              "title": "Hacktoberfest 2023 experience",
              "url": "https://aksbad007.hashnode.dev/hacktoberfest-2023-experience",
              "publishedAt": "2023-11-06T11:00:09.244Z",
              "seo": {
                "title": "Hacktoberfest Success: My Contributions to Open-Source Projects",
                "description": "Dive into my Hacktoberfest journey, where I contributed to various open-source projects. Learn about my coding experiences and the rewards I received."
              },
              "coverImage": {
                "url": "https://cdn.hashnode.com/res/hashnode/image/upload/v1700701676460/dfa41270-db27-46a3-bc2b-2511299f478e.jpeg"
              }
            }
          },
          {
            "node": {
              "title": "Hello World!",
              "url": "https://aksbad007.hashnode.dev/first-blog",
              "publishedAt": "2023-10-07T13:00:12.069Z",
              "seo": {
                "title": "Hello World! - Akshat Arora's First Blog",
                "description": "Get to know Akshat Arora, a Freelance Software Engineer as he shares his coding journey, experiences, and insights into the world of technology."
              },
              "coverImage": {
                "url": "https://cdn.hashnode.com/res/hashnode/image/stock/unsplash/wtpTL_SzmhM/upload/86a54d9b2c7bf75e062b020f6c3aeffd.jpeg"
              }
            }
          }
        ]
      }
    }
  }
}
Development
Now that we know how to get the data, let's actually write the code to fetch it. I'm using the fetch API provided by JavaScript in my React app. An example of that is below.
const query = `
    {
        publication(host: "aksbad007.hashnode.dev") {
            title
            url
            posts(first: 3) {
                edges {
                    node {
                        title
                        url
                        publishedAt
                        seo {
                            description
                        }
                        coverImage {
                            url
                        }
                    }
                }
            }
        }
    }
`

const fetchPosts = async () => {
    const response = await fetch('https://gql.hashnode.com', {
      method: 'POST',
      headers: {
        'Content-type': 'application/json',
      },
      body: JSON.stringify({ query }),
    })
    const ApiResponse = await response.json()

    return ApiResponse
}
The fetchPosts function is going to return the same response we got from the query earlier. We can run this function in the useEffect block of the react component, add the data into the component state, and render the info accordingly. This is what I achieved after a bit of CSS magic 🪄.
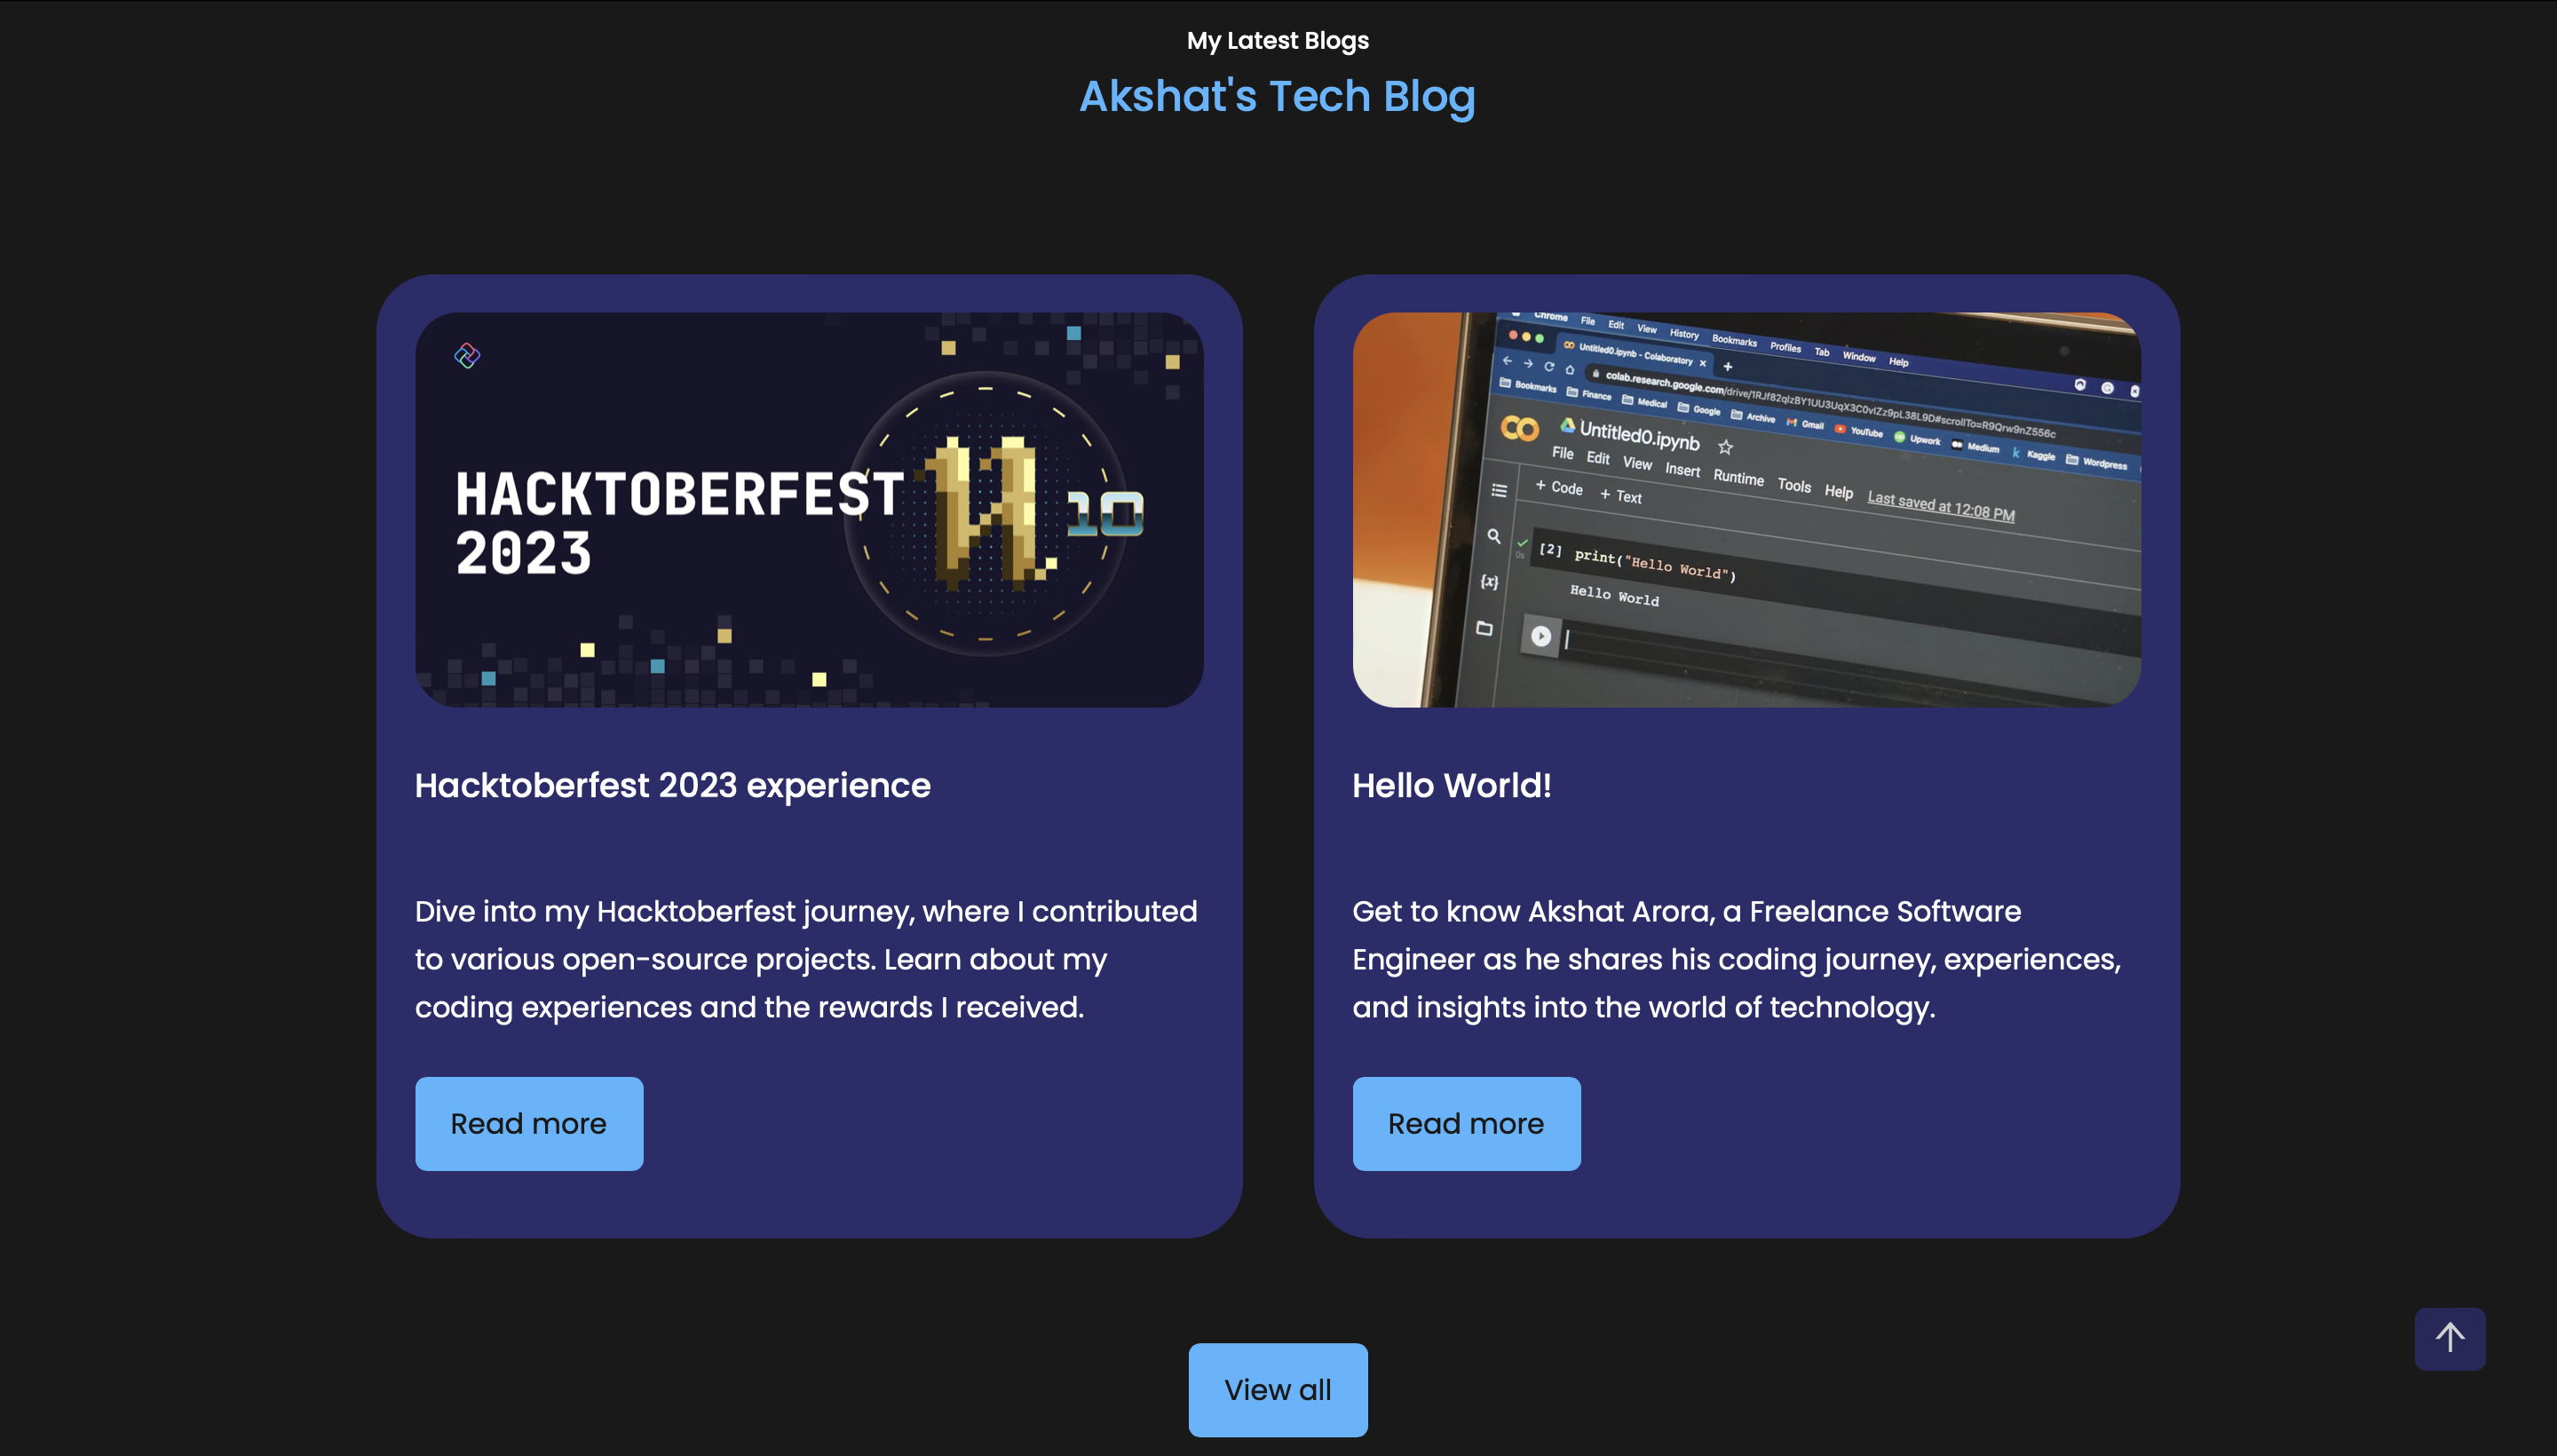
The heading contains the Title of the blog. The divs below contain the Title, SEO Description, Cover Image and the URL (Read More) of the blog post. The View all button is a link to the Hashnode Blog.
Conclusion
In conclusion, adding Hashnode blog posts to your portfolio enhances your online presence. Use the Hashnode GraphQL API to fetch and display your latest posts dynamically. Give your portfolio that extra touch and let your coding expertise shine!
Until next time 👋🏻!!!


